


Hi folks,
in this blog post, I will continue my series on Application Control for Business and explain how to create a base policy for fully managed devices – either based on a clean reference system or from an already used system and add additional file rules for Notepad++.
In the last post, I explained how to create a policy for lightly managed devices using the App Control Policy Wizard and the Microsoft policy template “Signed and Reputable Mode”. But what if you don’t want to rely on a Microsoft policy template and instead want to build your own policy from scratch? That is exactly what this post is about.
Note:
Previous Blog Posts:
- Mastering App Control for Business | Part 1: Introduction & Key Concept
- Mastering App Control for Business | Part 2: Policy Templates & Rule Options
- Mastering App Control for Business | Part 3: Application ID Tagging Policies & managed Installer
- Mastering App Control for Business | Part 4: How to create a “starter base policy” for lightly managed devices
Note: Instead of creating a base policy from scratch, I would recommend to use one of the both policy template from Application Control Policy Wizard and add additional rules if needed.
I also recommend creating and deploying all your policies in audit mode first and testing your policies broadly. You can use the following decision flow for your policy deployment.

You need to have a look into the Microsoft-Windows-CodeIntegrity/Operational event log to identify some issues.
Creating a base policy from scratch with PowerShell
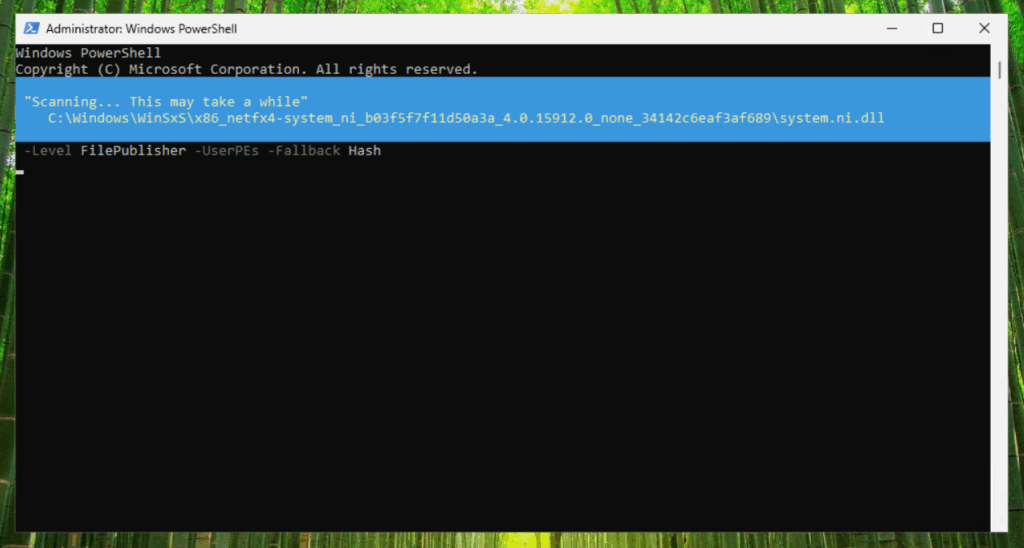
If you have set-up a reference system that is representative for your users devices, you can run the following comandline. After you executed the command, you have to wait a loooong time for it to finish because every file is scanned.
New-CIPolicy -MultiplePolicy -filePath "C:\temp\MyBigBusinessPolicyFromScratch.xml" -ScanPath C: -OmitPaths "C:\Windows.old" -Level FilePublisher -UserPEs -Fallback Hash
After the scan has finished, we have to define some additional policy rules.
Set-CIPolicyIdInfo -FilePath C:\temp\MyBigBusinessPolicyFromScratch.xml -PolicyName "MyBigBusinessPolicyFromScratch"

Set-CIPolicyVersion -FilePath C:\temp\MyBigBusinessPolicyFromScratch.xml -Version "1.0.0.0"
Set-RuleOption -FilePath C:\temp\MyBigBusinessPolicyFromScratch.xml -Option 0
Set-RuleOption -FilePath C:\temp\MyBigBusinessPolicyFromScratch.xml -Option 2
Set-RuleOption -FilePath C:\temp\MyBigBusinessPolicyFromScratch.xml -Option 3
Set-RuleOption -FilePath C:\temp\MyBigBusinessPolicyFromScratch.xml -Option 4
Set-RuleOption -FilePath C:\temp\MyBigBusinessPolicyFromScratch.xml -Option 9
Set-RuleOption -FilePath C:\temp\MyBigBusinessPolicyFromScratch.xml -Option 10
Set-RuleOption -FilePath C:\temp\MyBigBusinessPolicyFromScratch.xml -Option 12
Set-RuleOption -FilePath C:\temp\MyBigBusinessPolicyFromScratch.xml -Option 13
Set-RuleOption -FilePath C:\temp\MyBigBusinessPolicyFromScratch.xml -Option 17
Set-RuleOption -FilePath C:\temp\MyBigBusinessPolicyFromScratch.xml -Option 19

Set-HVCIOptions -Strict -FilePath C:\temp\MyBigBusinessPolicyFromScratch.xm
I have explained all these options in my blog.post: Mastering App Control for Business | Part 2: Policy Templates & Rule Options – ctrlshiftenter.cloud. If you not sure about the hypervisor-protected code integrity, have a look at this: Enable memory integrity | Microsoft Learn
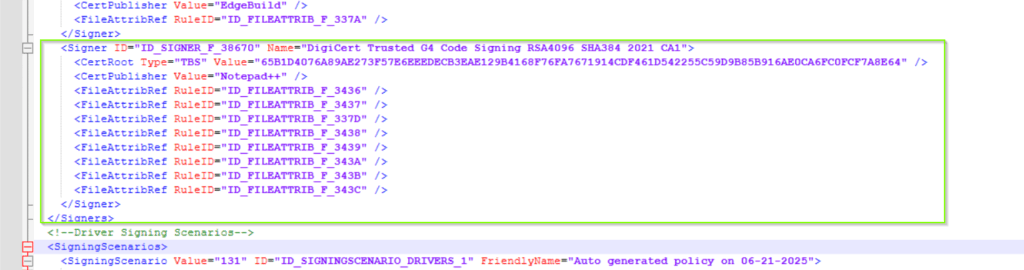
On my reference system, I installed Notepad++ as an additional application before I started the scan. When I open the policy xml file, I can see, that Notepad++ has been identified as a trusted publisher and file hashes defined as fallback:

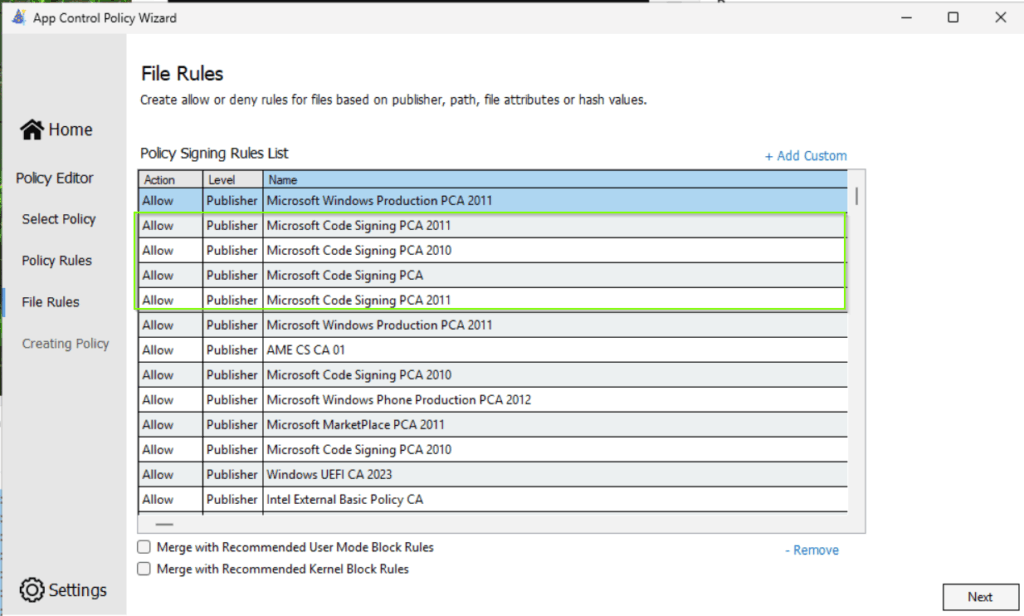
Now, If you open the resulted policy xml file in App Control Policy Wizard, you can see a lot of duplicated trusted publisher entries. I recommend to removing these duplicates.
Example policy file as result of the command execution above:
File rule options
I explained the file rules topic already in the blog post: Mastering App Control for Business | Part 2: Policy Templates & Rule Options but I will explain the important things again.
| Parameters | Description | Value |
| -MultiplePolicy | Indicates that this cmdlet should create a policy in multiple policy format as opposed to a single policy format. | |
| -filePath | Specifies the path for the Code Integrity policy .xml file. | local file path to store the xml file |
| -ScanPath | Specifies the path for this cmdlet to scan. You can specify a local or remote path. Specify this parameter only if you do not provide driver files or rules. | local scan path – C: to scan the entire system |
| -Level | Specifies the primary level of detail for generated rules. Refers to the file rule levels: Understand App Control for Business policy rules and file rules | Microsoft Learn | FilePublisher – This level combines the “FileName” attribute of the signed file, plus “Publisher” (PCA certificate with CN of leaf), plus a minimum version number. This option trusts specific files from the specified publisher, with a version at or above the specified version number. By default, this level uses the OriginalFileName attribute of the file’s resource header. Use -SpecificFileNameLevel to choose an alternative attribute, such as ProductName. |
| -UserPEs | Indicates that this cmdlet includes user-mode files in the scan. Specify this parameter only if you do not scan & provide driver files or rules. (after the scan has finished, we configure WHQL drivers to be allowed) | |
| -Fallback | Specifies an array of levels of detail for generated rules. If this cmdlet cannot generate a rule at the specified level, this cmdlet attempts to generate it at a fallback level. The acceptable values for this parameter are the same as for Level. If you specify multiple fallback levels, this cmdlet tries them in order. Understand App Control for Business policy rules and file rules | Microsoft Learn | Hash – Specifies individual Authenticode/PE image hash values for each discovered binary. This level is the most specific level, and requires more effort to maintain the current product versions’ hash values. Each time a binary is updated, the hash value changes, therefore requiring a policy update. |
| -OmitPaths | Specifies an array of paths that this cmdlet omits from the search. Specify this parameter only if you do not provide driver files or rules. | I recommend to exclude the C:\Windows.old path if it exists.. |
You can find a full list of parameters here: New-CIPolicy (ConfigCI) | Microsoft Learn
Fallback options, why they are less secure and what effort is required to maintain these policies.
| Fallback Level | Security Level | Description | Maintenance Effort |
|---|---|---|---|
| FileName | 🔴 Low | Matches based only on the file name (e.g. app.exe). Easy to spoof, no validation of publisher. | 🟢 Low – names rarely change, but offers poor security |
| FilePath | 🔴 Low | Allows all files from a specific folder path. Doesn’t validate the actual files. | 🟢 Low – unless folder structure changes |
| Publisher | 🟠 Medium | Allows any file signed by the same company certificate (e.g. Microsoft, Adobe). | 🟢 Low – as long as the signing certificate remains valid |
| LeafCertificate | 🟡 Acceptable | Allows all files signed with a specific leaf certificate. Safer than Publisher, but still allows all signed files. | 🟡 Medium – leaf certs may expire more frequently |
| SignedVersion | 🟡 Acceptable | Allows files from the same publisher at or above a certain version. | 🟠 Medium-High – can cause issues if newer versions introduce risk |
| FilePublisher | 🟢 High | Allows a specific files (based on original file name), signed by a specific publisher, and with a minimum version. | 🟡 Medium – only update when publisher ca or file name changes |
| Hash | 🟢 Very High | Allows only that exact version of a file. | 🔴 High – needs frequent updates for every file change or update |
| WHQL options | 🟢 High (for drivers) | Trusts only Microsoft-certified drivers via WHQL. Best used for kernel-mode protection. | 🟢 Low – stable and centrally managed by Microsoft |
Creating a base policy with App Control Policy Wizard and add additional file rules for Notepad++
As I mentioned at the beginning of this post, I recommend to use one of the both highlighted Application Control for Business templates from App Control Policy Wizard and add additional allow rules if needed.
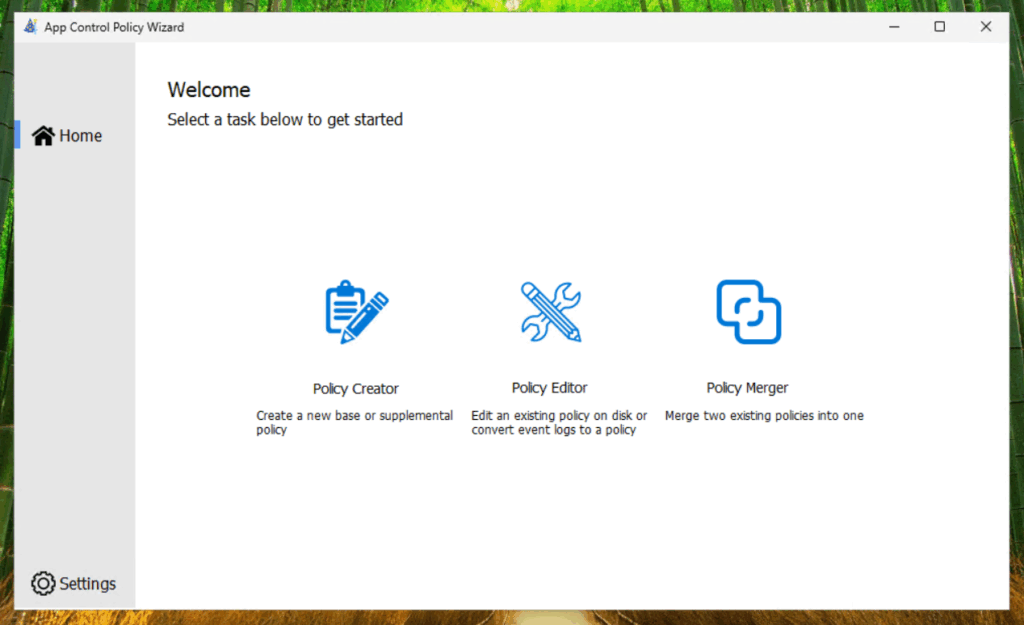
First, open the App Control Policy Wizard and select Policy Creator.
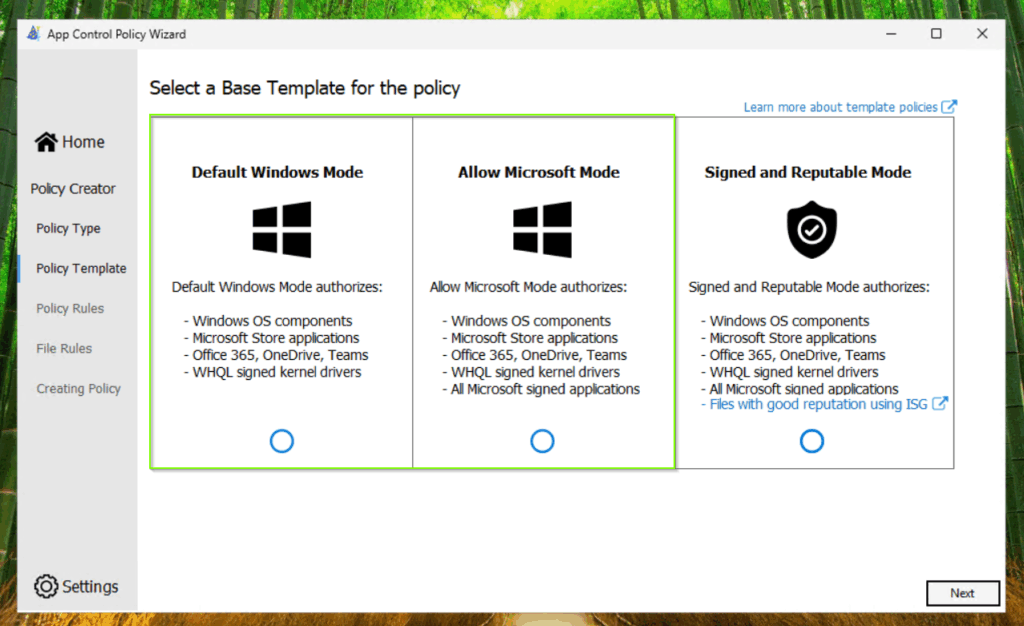
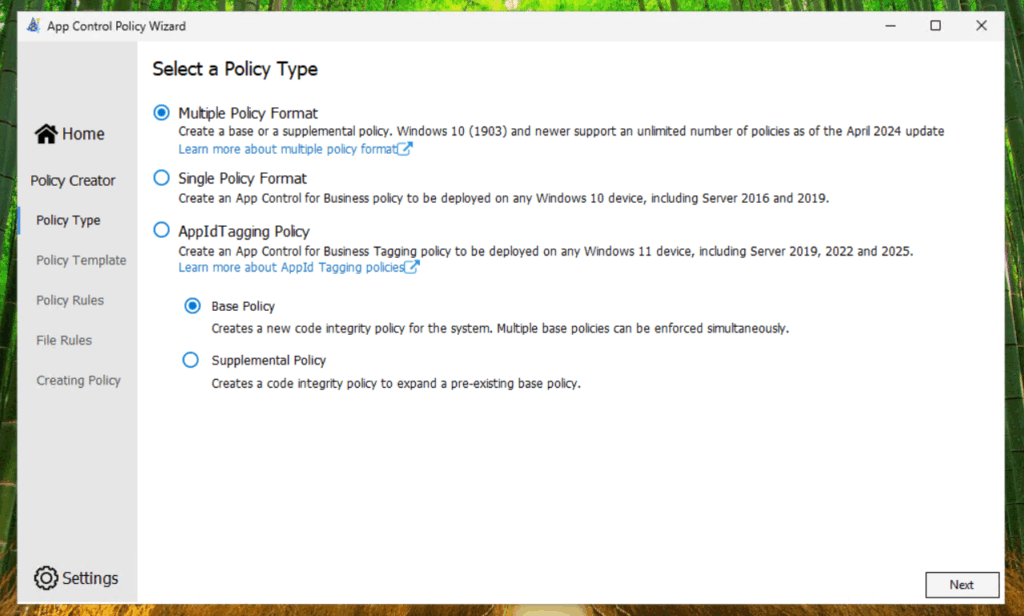
Afterwards select Multiple Policy Format (if we need to extend the base policy with supplemental policies) and Base Policy.
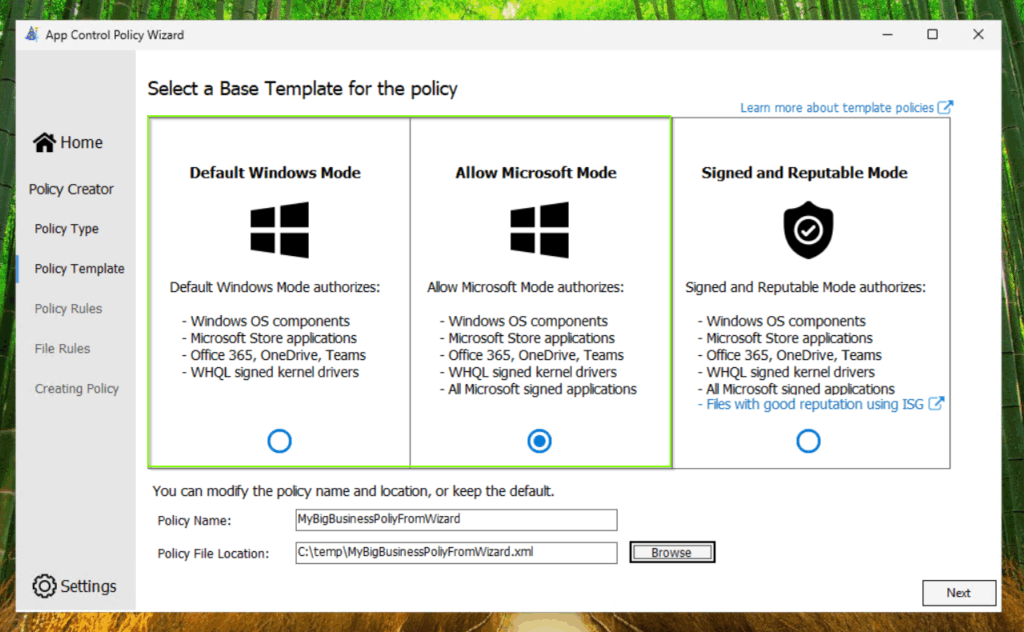
Select on of the both highlighted Application Control for Business templates. I will continue with the Allow Microsoft Mode template. Give your policy a name and define the output directory.
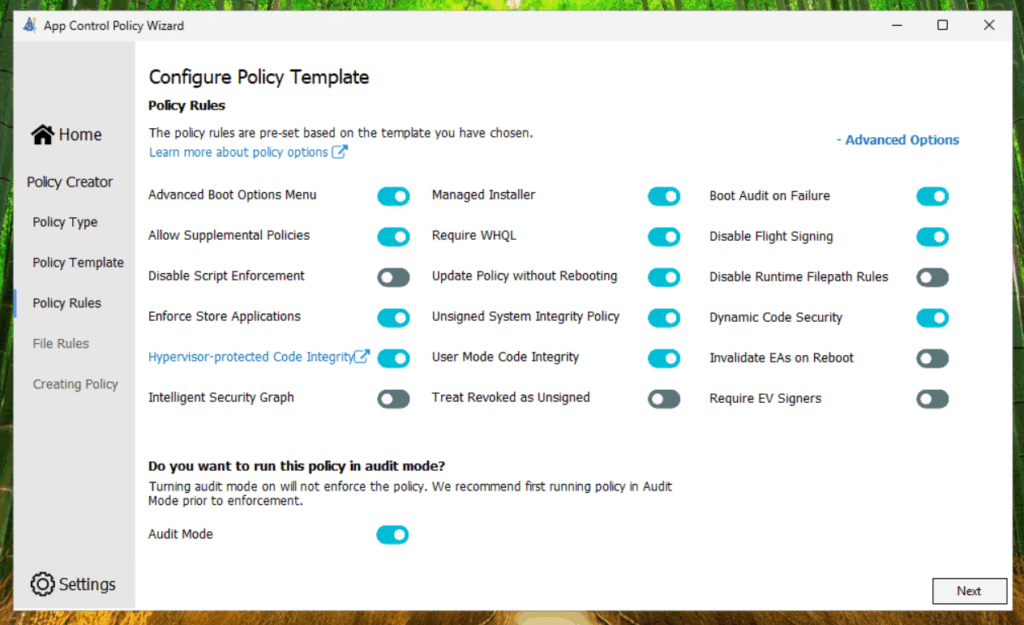
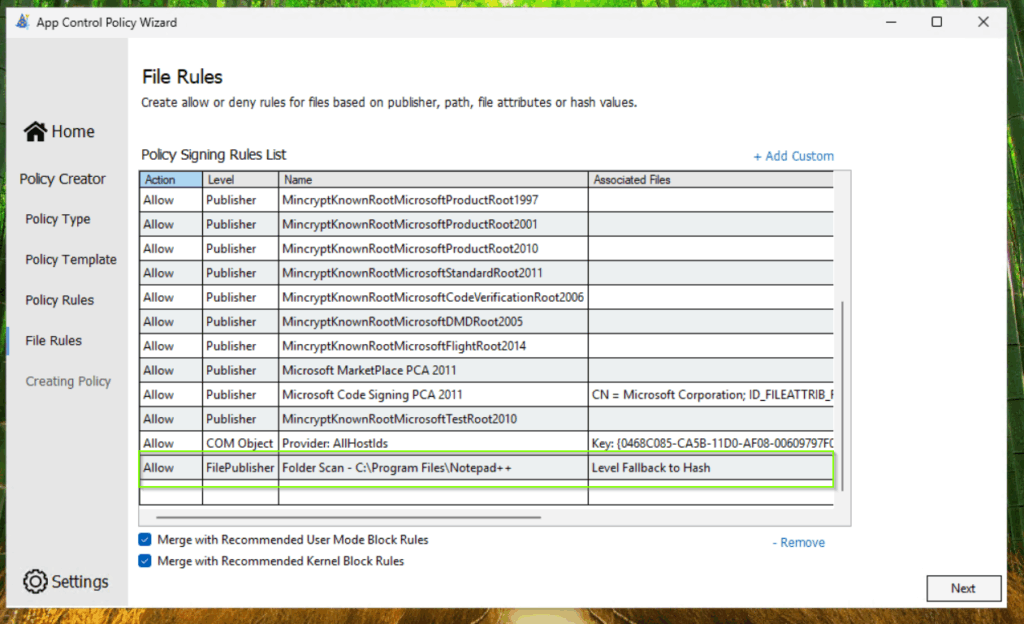
Afterwards we define the following policy rules:
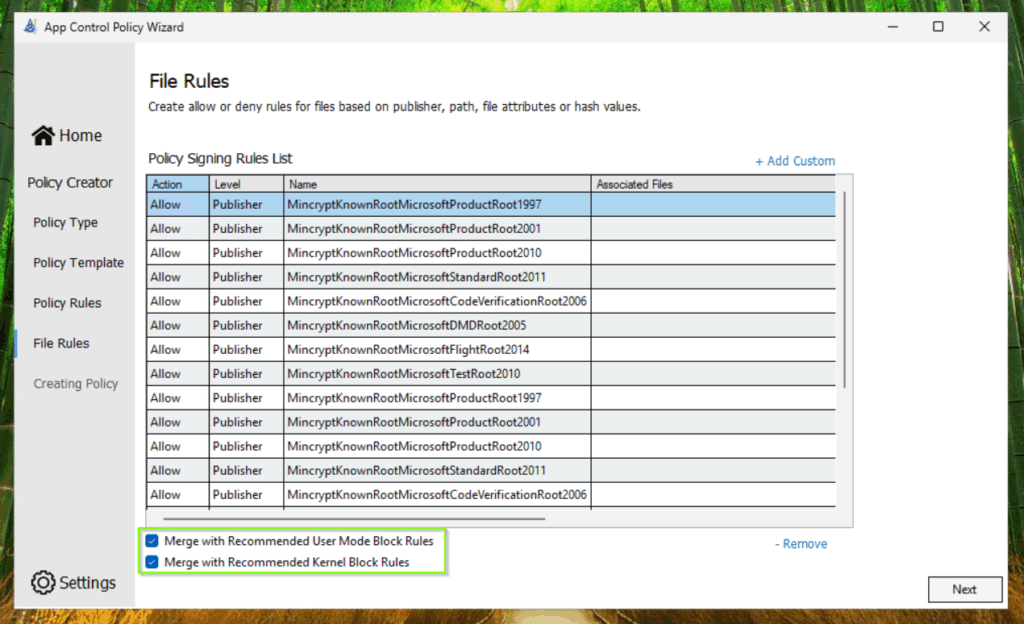
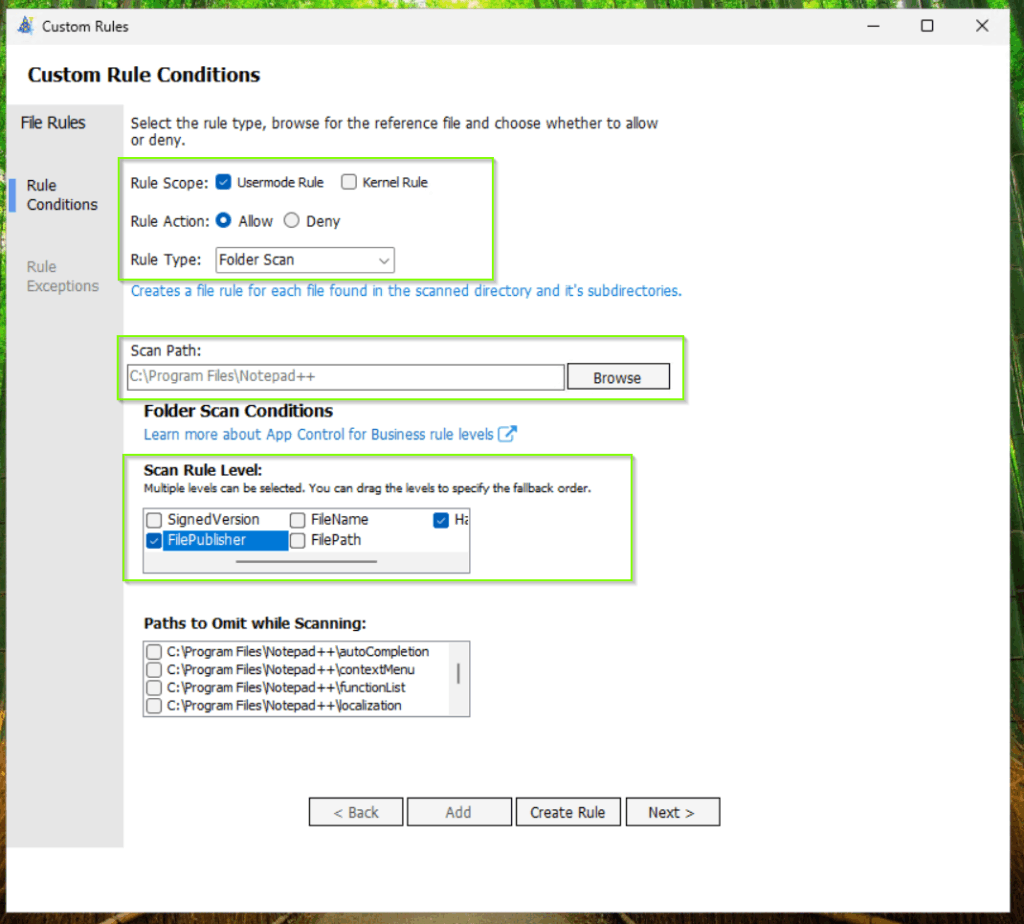
Add custom rules for Notepad++ to your base policy.
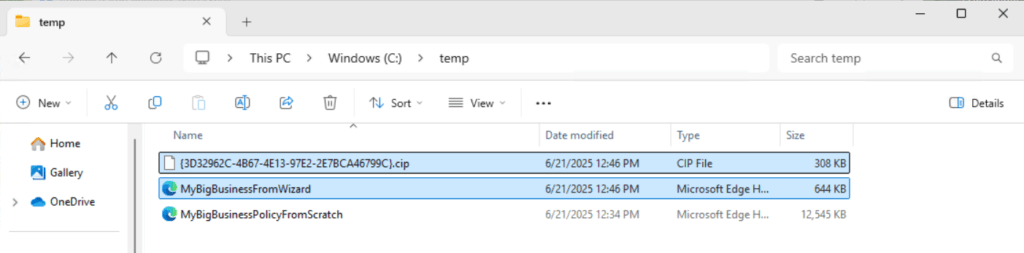
As a result, you get two files:
- base policy as xml file
- base policy as binary file for applying
Apply your policy locally
If you have selected a policy which was created with the cmdlet New-CIPolicy, you have to convert the policy to a binary file bevor you can apply it with the citool.
ConvertFrom-CIPolicy -XmlFilePath C:\temp\MyBigBusinessPolicyFromScratch.xml -BinaryFilePath C:\temp\MyBigBusinessPolicyFromScratch.bin
If you have selected a policy which was created with the App Control Policy Wizard, then the Wizard has already created a binary file.
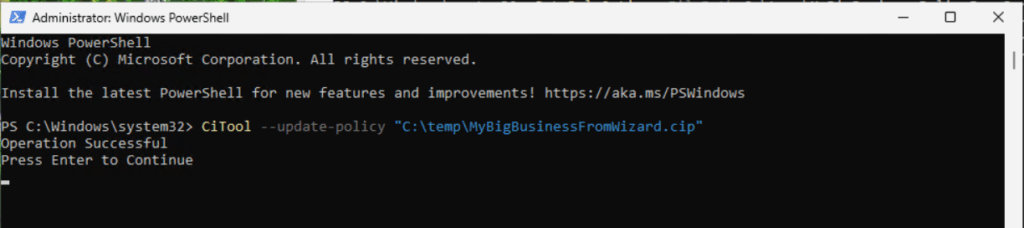
Apply the Application Control for Business policy locally:
CiTool --update-policy "C:\temp\MyBigBusinessFromWizard.cip"
User-Experience with enforced policies
Once the policy is active and applied in enforcement mode, everything is easy to test:
- The device does not need to restart
- If a user tries to open an app that isn’t allowed by the policy, it will be blocked automatically.
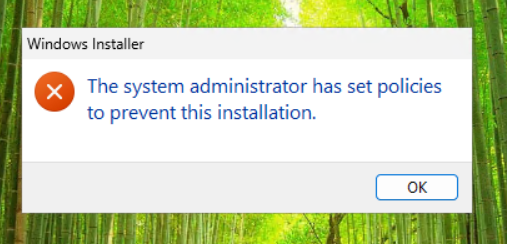
If you try to install a not allowed application manually, you get the following notification:
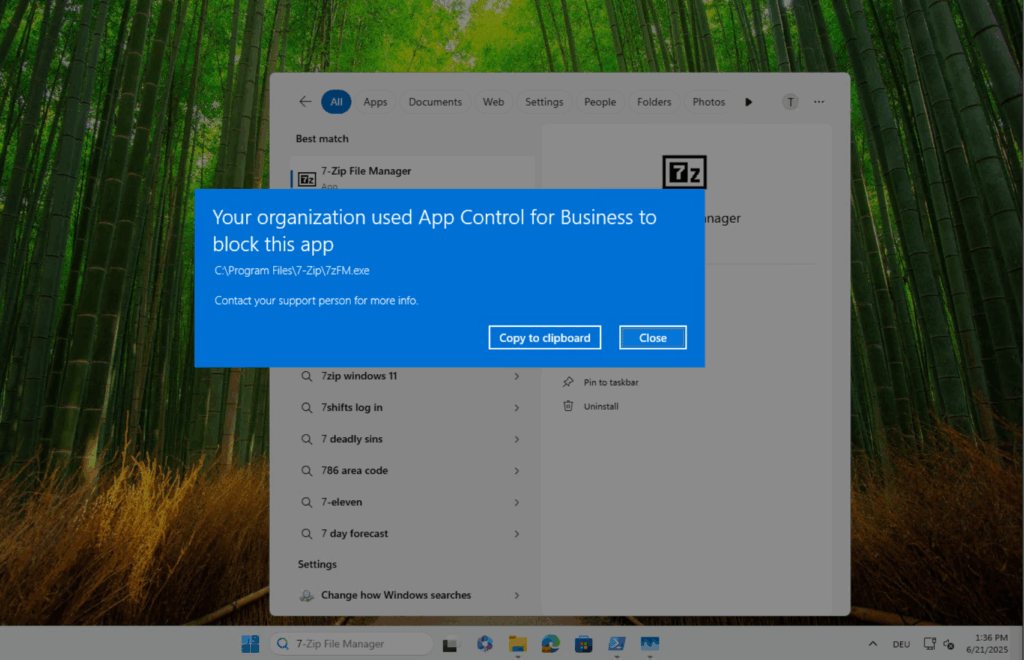
If you try to execute a not allowed application which is already installed, you get the following notification:
Troubleshoot your policies
In post 4 of this blog-post series, I explained how you can identify issues with your policy via the eventlog and comandline tools:

