

In the last three blog posts about App Control for Business, I talked a lot of theory and explained the key concepts behind the different policy types and options. Now, in this blog post, I will start to get more practical and show you how to create a starter policy for lightly managed devices using Smart App Control policy as a template.
As you might remember from my first blog posts in this series: Mastering App Control for Business | Part 1: Introduction & Key Concept, Smart App Control is an app control based security solution already built into Windows 11 and originally designed for consumer use. For enterprise managed devices Smart App Control is automatically disabled. However, it use the same technology so it is a useful starting point to get more familiar with App Control for Business as it includes the most of the Microsoft recommended block rules that are well-suited for lightly managed devices. by the end of this blog post, you will have a starting point and a policy running in audit mode.
Previous Blog Posts:
- Mastering App Control for Business | Part 1: Introduction & Key Concept
- Mastering App Control for Business | Part 2: Policy Templates & Rule Options
- Mastering App Control for Business | Part 3: Application ID Tagging Policies & managed Installer
Story
Imagine my company is called “My Big Business Company”. They want to improve how they manage apps on their windows based company laptops and PCs. Right now, employees can install and run almost any app they want. That was okay in the past, but now “My Big Business Company” wants to make things safer by blocking apps that aren’t allowed or could be risky.
Patrick is a team member of the “My Big Business Company” IT department and want to rolling out App Control for Business.
Patrick knows that if they block too many apps at once, many employees might get frustrated. So, he wants to start slowly. His plan for short-term is to create one smart standalone policy that works well for most people in the company and expand the policy with more restrictive rules in the future.
To do this, he picks the “Signed & Reputable” policy template
- %OSDrive%\Windows\schemas\CodeIntegrity\ExamplePolicies\SmartAppControl.xml
for modification. This template allows only apps that are well-known and signed by publicly trusted companies or unsigned apps that have a good reputation are executable. It’s a good starting point and let the most business apps run smoothly, while keeping out unknown or unsafe software. To evaluate the reputation of an App, App Smart App Control uses the Intelligent Security Graph (ISG).
Patrick has identified the following requirements for a policy:
- Windows components, Microsof Store Apps, Microsoft 365 Apps, Microsoft certified kernel drivers and all Microsoft signed applications must be allowed (already built in the Smart App Control policy template)
- Publicly-trusted signed code must be allowed (already built in the Smart App Control policy template)
- Apps with a good reputation must be allowed (Intelligent Security Graph (ISG)) (already built in the Smart App Control policy template)
- Intune should be configured as a managed installer
- Does not need a reboot after deployment
Create the policy from template
Manual processing
As I described above, Windows 11 22H2 and newer has a built in example App Control for Business template that is based on Smart App Control. The filename is named SmartAppControl.xml and is located in the folder: %OSDrive%\Windows\schemas\CodeIntegrity\ExamplePolicies
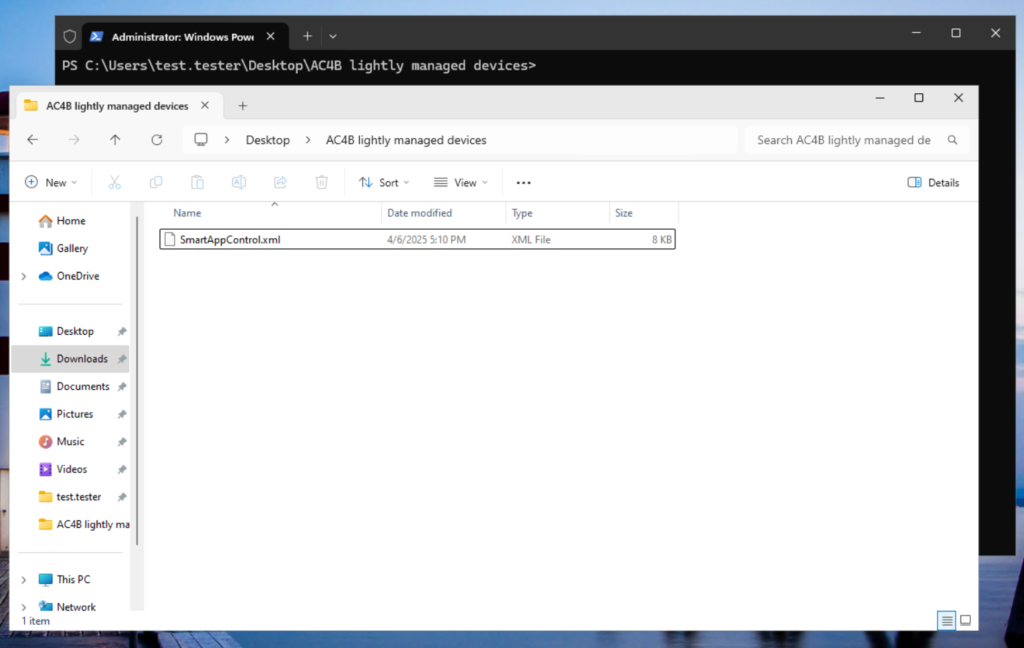
I copied the file to my working dir:
Remove Conditional Windows Lockdown Policy
The first steps are removing some code snippets that aren’t supported for the managed version of App Control for Business Policies:
    <Rule>
      <Option>Enabled:Conditional Windows Lockdown Policy</Option>
    </Rule>
and
<Setting Provider="Microsoft" Key="WindowsLockdownPolicySettings" ValueName="ShellSmartscreenSuppressed">
      <Value>
        <Boolean>true</Boolean>
      </Value>
    </Setting>
        <Setting Provider="Microsoft" Key="WindowsLockdownPolicySettings" ValueName="BrowserSmartscreenSuppressed">
      <Value>
        <Boolean>true</Boolean>
      </Value>
    </Setting>
    <Setting Provider="Microsoft" Key="WindowsLockdownPolicySettings" ValueName="ISGSmartscreenTrustSuppressed">
      <Value>
        <Boolean>true</Boolean>
      </Value>
    </Setting>
    <Setting Provider="Microsoft" Key="WindowsLockdownPolicySettings" ValueName="VerifiedAndReputableUI">
      <Value>
        <Boolean>true</Boolean>
      </Value>
    </Setting>
    <Setting Provider="Microsoft" Key="WindowsLockdownPolicySettings" ValueName="WindowsLockdownOfficeExtensions">
      <Value>
        <Boolean>true</Boolean>
      </Value>
    </Setting>
    <Setting Provider="Microsoft" Key="WindowsLockdownPolicySettings" ValueName="VerifiedAndReputablePerfMode">
      <Value>
        <Boolean>true</Boolean>
      </Value>
    </Setting>
    <Setting Provider="Microsoft" Key="WindowsLockdownPolicySettings" ValueName="VerifiedAndReputableTrustMode">
      <Value>
        <Boolean>true</Boolean>
      </Value>
    </Setting>
    <Setting Provider="Microsoft" Key="WindowsLockdownPolicySettings" ValueName="WindowsLockdownDangerousExtensionValidation">
      <Value>
        <Boolean>true</Boolean>
      </Value>
    </Setting>
    <Setting Provider="Microsoft" Key="WindowsLockdownPolicySettings" ValueName="WindowsLockdownDangerousExtensionEnforcement">
      <Value>
        <Boolean>true</Boolean>
      </Value>
    </Setting>
    <Setting Provider="Microsoft" Key="WindowsLockdownPolicySettings" ValueName="DisableMshtmlUmci">
      <Value>
        <Boolean>true</Boolean>
      </Value>
    </Setting>
    <Setting Provider="Microsoft" Key="WindowsLockdownPolicySettings" ValueName="VerifiedAndReputableAllowAntiMalware">
      <Value>
        <Boolean>true</Boolean>
      </Value>
    </Setting>
Set basic policy information
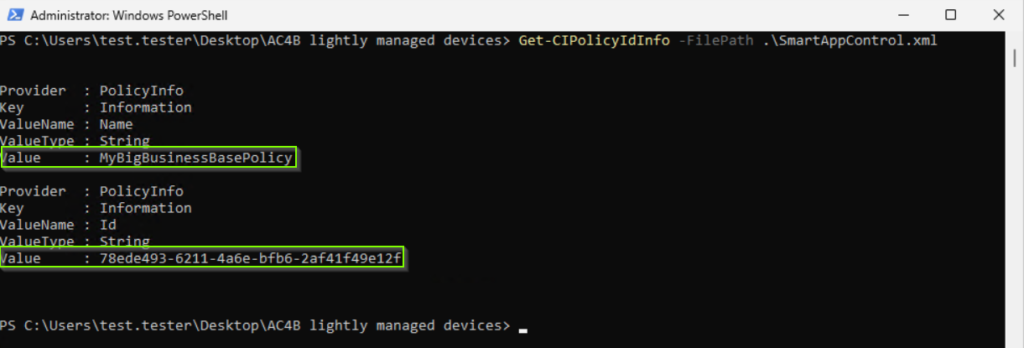
It is recommended to set some base information and generate a new policy id instead of using the original id from the template. You can do this using the PowerShell cmdlets: Set-CIPolicyVersion and Set-CIPolicyIdInfo.
Policy Version
Set-CIPolicyVersion -FilePath .\SmartAppControl.xml -Version "1.0.0.0"Policy Name
Set-CIPolicyIdInfo -FilePath .\SmartAppControl.xml -PolicyName "MyBigBusinessBasePolicy"Policy ID
$guid = New-Guid
Set-CIPolicyIdInfo  -FilePath .\SmartAppControl.xml -PolicyId $guid
Now, you can validate the changed information with the following commands:
The policy version can not be queried using a PowerShell command but it is included in the policy xml file.

Set the required security options
If you need an overview of all security options, I recommend the second blog post in this series: Mastering App Control for Business | Part 2: Policy Templates & Rule Options
Require WHQL
Set-RuleOption -FilePath .\SmartAppControl.xml -Option 2Correlates with the XML file snippet:
    <Rule>
      <Option>Required:WHQL</Option>
    </Rule>
Enable Audit Mode
I recommend enabling the audit mode at first. After you deployed the policy and confirmed that all works as expected, you can disable the audit mode and enforce the policy.
Set-RuleOption -FilePath .\SmartAppControl.xml -Option 3Correlates with the XML file snippet:
<Rule>
      <Option>Enabled:Audit Mode</Option>
</Rule>
Enabled unsigned System Integrity Policy support
For a simple starting point, I recommend using an unsigned policy. After your are confident in working with App Control for Business Policies, I recommend signing the policy for security reasons.
Set-RuleOption -FilePath .\SmartAppControl.xml -Option 6Correlates with the XML file snippet:
    <Rule>
      <Option>Enabled:Unsigned System Integrity Policy</Option>
    </Rule>
Enable managed installer support
Enable managed installer support to whitelist all apps which were deployed through Intune.
Set-RuleOption -FilePath .\SmartAppControl.xml -Option 13Correlates with the XML file snippet:
<Rule>
      <Option>Enabled:Managed Installer</Option>
</Rule>
Enable update policy without reboot
Allows future policy updates to be applied without requiring a system reboot.
Set-RuleOption -FilePath .\SmartAppControl.xml -Option 16Correlates with the XML file snippet:
<Rule>
      <Option>Enabled:Update Policy No Reboot</Option>
</Rule>
Application Control Policy Wizard processing
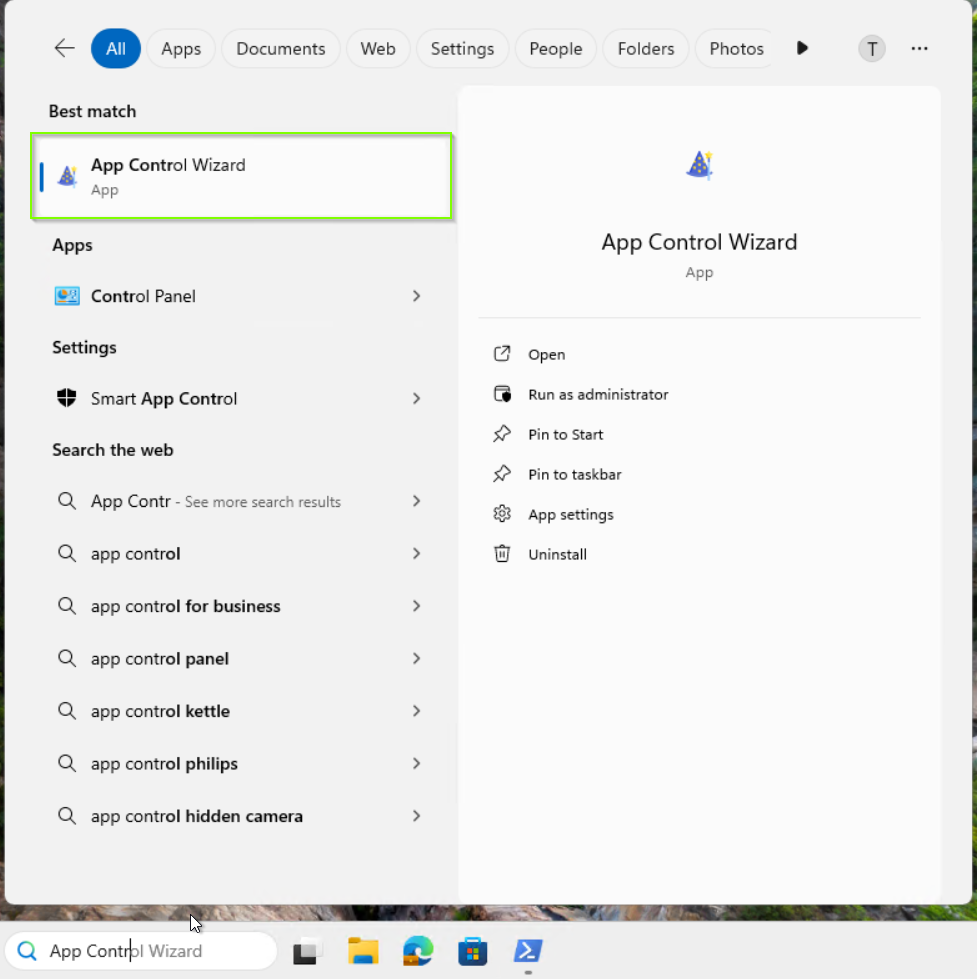
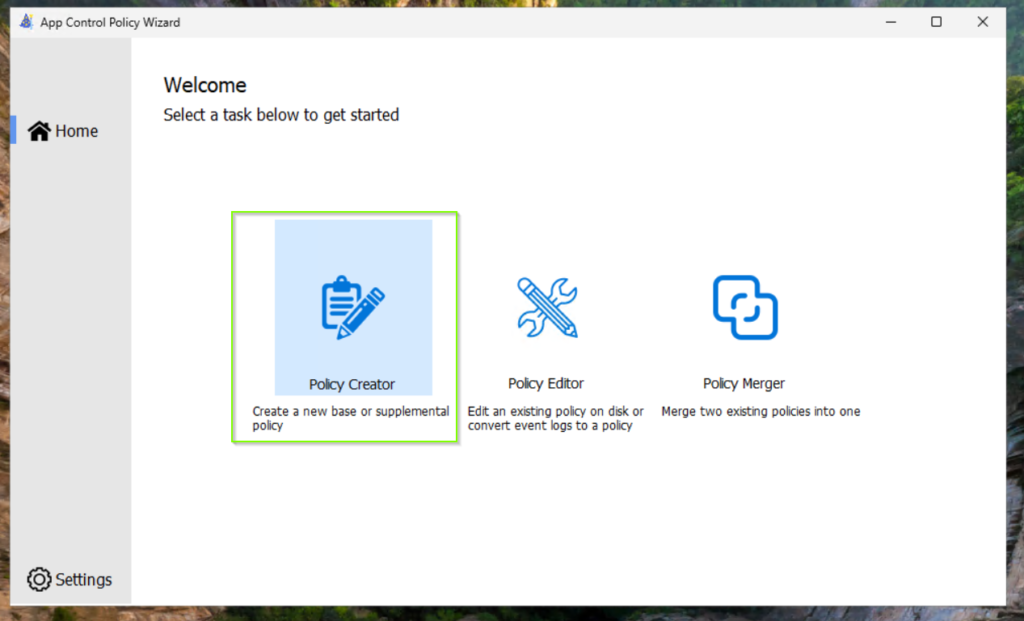
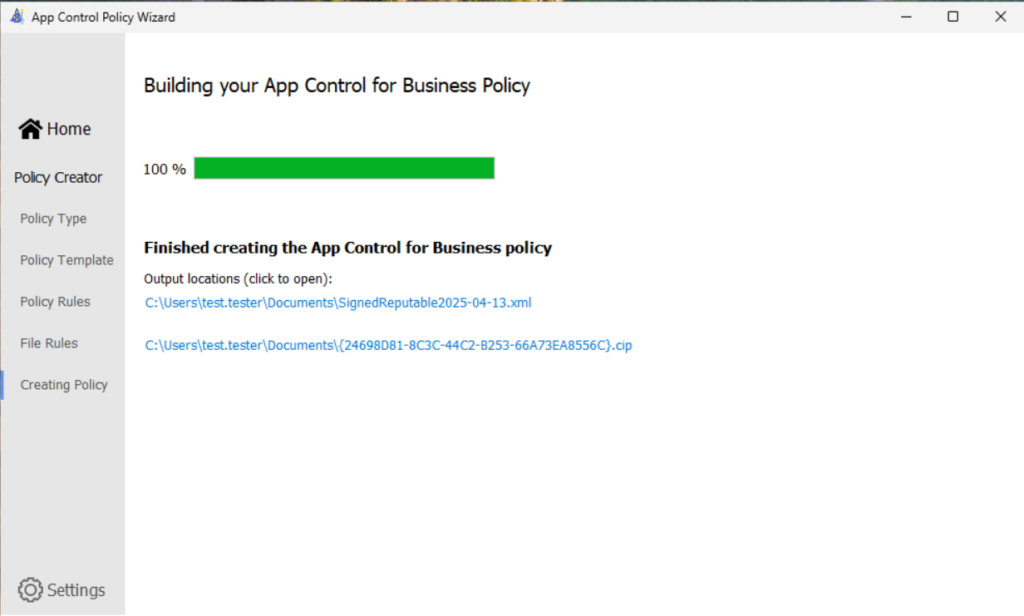
The Microsoft Application Control for Business Wizard (formerly known as WDAC Wizard) enable us to build and edit Application Control for Business Policies in a smother way by providing an easy to use interface. To be able to work with it, we have to download and install the Application Control Policy Wizard from here: Microsoft App Control Wizard. After the installation is completed, you find a new icon in the start menu:
Our approach is it to use a similar template for a good and easy starting point.
Create a new multiple base policy format from a template
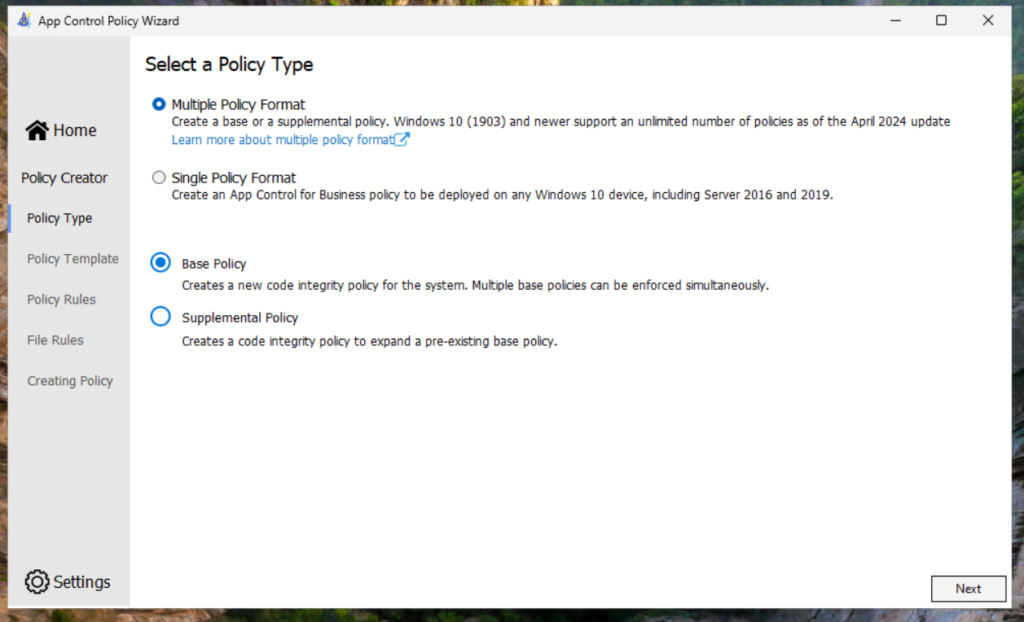
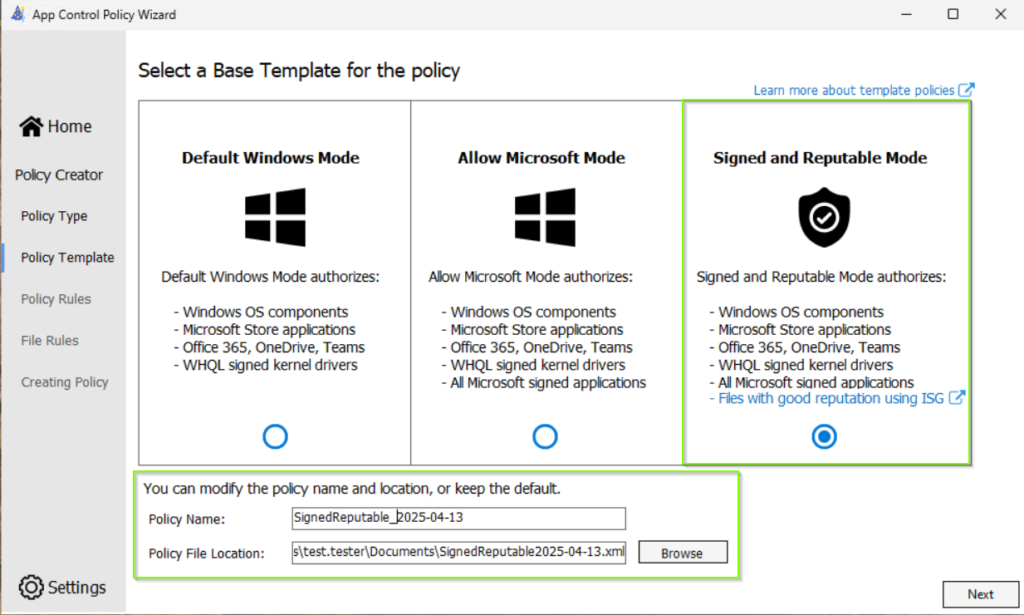
Note: If you have not established any source and version control system for your configuration files and code, then I recommend to using a meaningful filename.
In the next step, we define the security options. As mention above, we need the following options to be enabled:
- Enforce Store Application so that the policies are also applied to Microsoft Store Apps.
- Intelligent Security Graph to use the app reputation service.
- Managed Installer to define Intune as a trusted Installer and whitelisted all apps that deployment through Intune.
- Require WHQL so that every driver must be WHQL signed and removes legacy driver support. Kernel drivers built for Windows 10 and 11 must be WHQL certified.
- Update Policy without Rebooting is used to allow future policy updates to apply without requiring a system reboot.
- Unsigned System Integrity Policy allows you to get started without needing to sign the policies files. It is recommended to sign the policies in future once you are more familar with App Control for Business.
- Audit Mode allows you to get started in audit mode without enforcement.
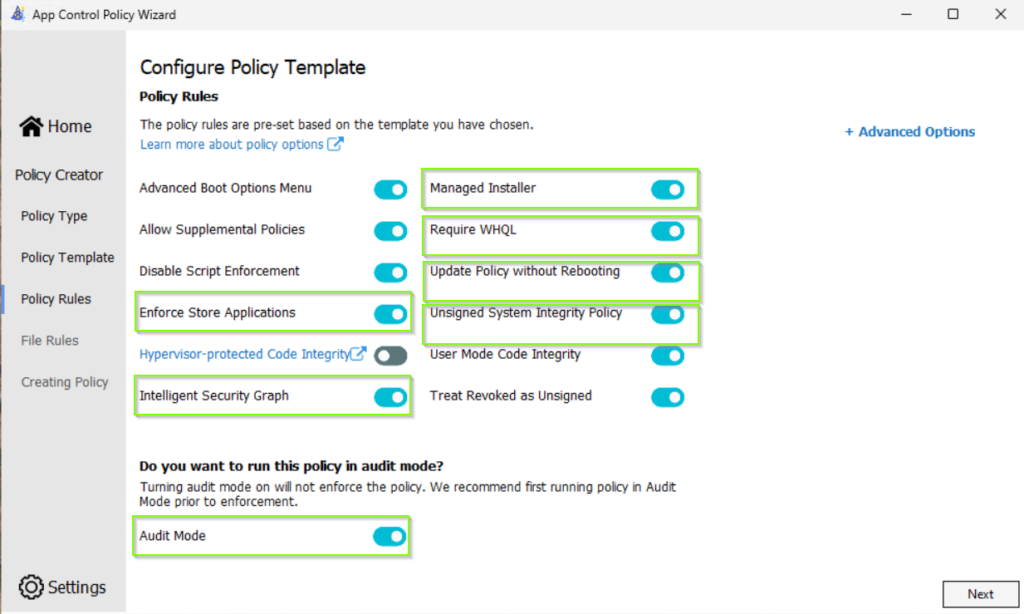
The next screen shows capabilities that we did not have when we edited the Smart App Control Policy template manual as I described in the “Manual Processing” section. We can enable the both checkbox Merge with Recommended User Mode Block Rules and Merge with Recommended Kernel Block Rules. Both capabilities allow us to integrate known bad signers as deny rules in our policy.

Convert the Policy XML to binary for PowerShell or Group Policy deployment
Before we can deploy our App Control for Business Policy by PowerShell or Group Policy, we need to convert the XML file to a binary form. If you want to deploy the policy through Intune, which is the recommended way, you do not need to convert the XML into a binary form – meanwhile it is possible to upload the XML file in Intune.
The following steps are required for both – whether you created the policy from the Smart App Control template or with the App Control for Business Wizard. Please note, that the filenames could be different.
ConvertFrom-CIPolicy -XmlFilePath .\SmartAppControl.xml -BinaryFilePath .\SmartAppControl.binDeploying policies for Windows 11 22H2 and above, and Windows Server 2025 and above with PowerShell
Note: This method is for testing purpose only. It is recommended deploying the policies through Intune.
$PolicyBinary = "C:\Users\test.tester\Desktop\AC4B lightly managed devices\SmartAppControl.bin"
CiTool --update-policy $PolicyBinary
The citool only exists in Window 11 22H2 or Windows Server 2025 and newer and is used to manage the App Control for Business Policies per command line.
If you need to deploy the policies on Windows 10 or on older versions of Windows 11 and Windows Server operating systems, you have to use the Refresh CI Policy Tool as described here: Deploy App Control for Business policies using script | Microsoft Learn. The Policy Refresh Tool can be downloaded from Microsoft: Download Refresh CI Policy from Official Microsoft Download Center
Validate the policy deployment
There are many ways for validating the deployment state of a policy. I have divided this part into multiple short subparts.
Control if the policy is applied
citool
To control whether the App Control for Business Policy is applied or not, you can use the citool again. The following command displays all the applied policies.
citool --list-policiesAs you can see in the screenshot below, there are some other policies applied to a Windows 11 24H2 device by default. I have highlighted our MyBigBusinessPolicy in the screenshot below.
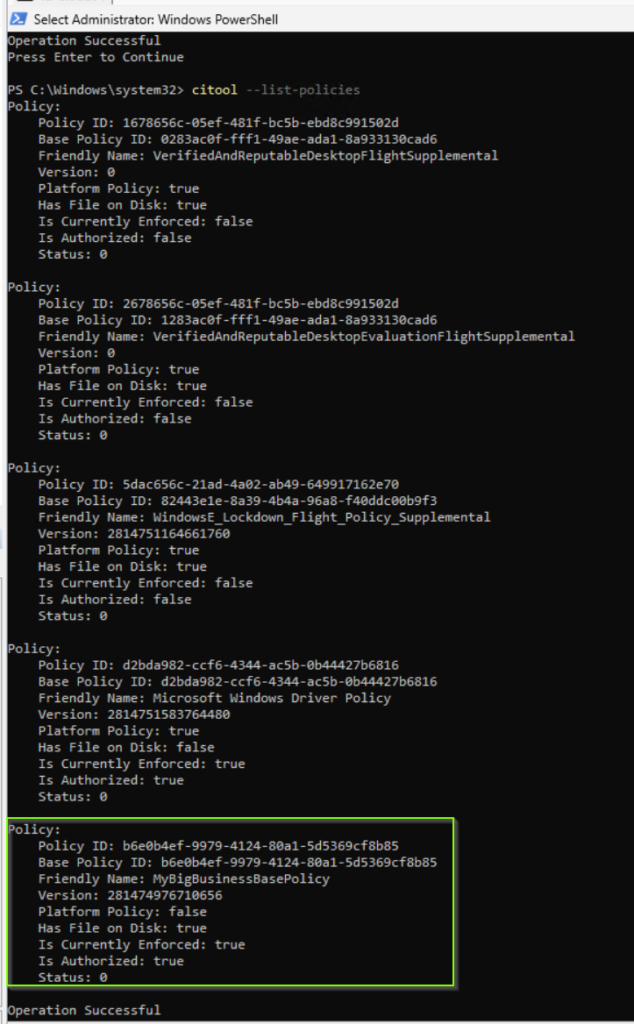
What information can we obtain from the query?
| Attribute | Description | Example value |
|---|---|---|
| Policy ID | Lists the ID of the policy. | b6e0b4ef-9979-4124-80a1-5d5369cf8b85 |
| Base Policy ID | Lists the ID of the base policy. | b6e0b4ef-9979-4124-80a1-5d5369cf8b85 |
| Friendly Name | Value listed in <Setting Provider="PolicyInfo" Key="Information" ValueName="Name"> | MyBigBusinessBasePolicy |
| Version | Version of the policy listed in <VersionEx> | 281474976710656 |
| Platform Policy | Indicates whether the policy is provided by Microsoft, for example in the vulnerable driver blocklist policy. As you can see in the screenshot above, there are some policies applied by default. These are platform policies from Microsoft.. | false |
| Policy is Signed | Indicates whether the policy has a valid signature. | false |
| Has File on Disk | Indicates whether the policy file is currently on the disk. | false |
| Is Currently Enforced | Indicates whether the policy file is active. Note: This is not the enforcement mode. “Is currently enforced” means that this policy is enabled or not. | true |
| Is Authorized | If the policy requires a token to be activated, this value is the state of authorization for the token. If the policy doesn’t require a token, this value matches the value for the Is Currently Enforced property. | true |
Code integrity folder
Before we continue, let’s take a look at the folder: C:\Windows\System32\CodeIntegrity\
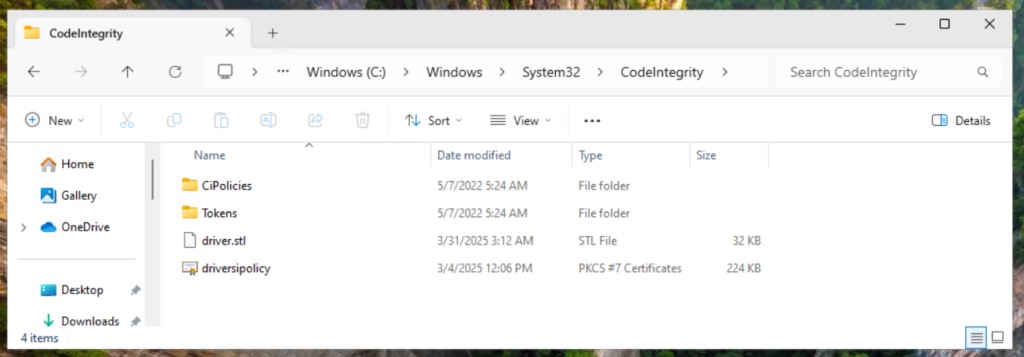
This helps us to understand when and where different files are created.
- If you see a file named SiPolicy in this folder, it means you have a Single Policy Format Policy applied.
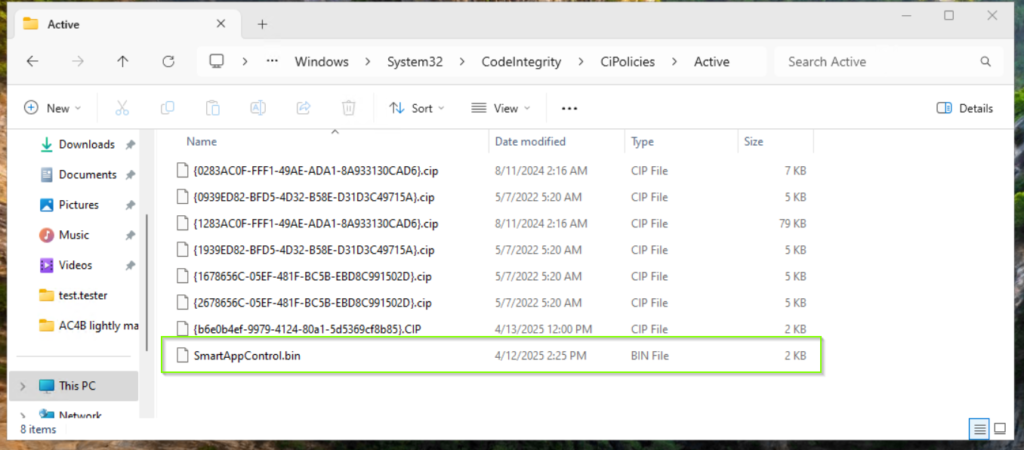
- If you chose the Multiple Policy Format Policy, the policy file will be saved in a subfolder called:
CodeIntegrity\CiPolicies\Active
Eventlog
The Application Control for Business events can be found in the path: Microsoft-Windows-CodeIntegrity/Operational. In this event log many events are logged. You can find a description of all possible events here: Understanding App Control event IDs | Microsoft Learn.
As you can see in the screenshot below, the very first interesting event you must look out for, is event id: 3099 which indicates that the policy has been successfully loaded.
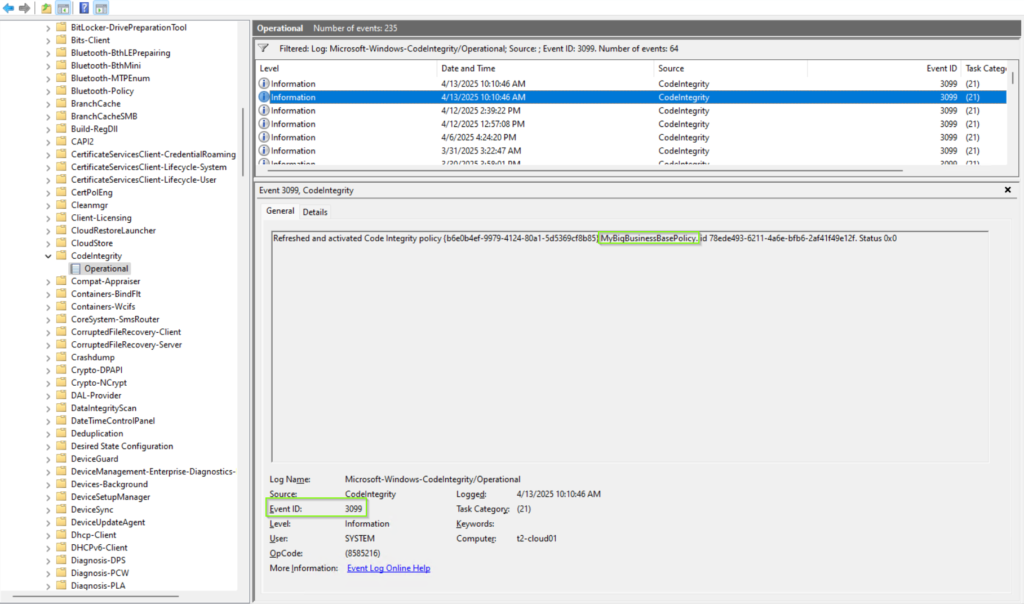
You can also use an XML filter query to find the specific event for our policy MyBigBusinessBasePolicy with the policy id: {b6e0b4ef-9979-4124-80a1-5d5369cf8b85}. However, I will dive deeper in troubleshooting in a future blog post.
$filterXml = @"
<QueryList>
  <Query Id="0" Path="Microsoft-Windows-CodeIntegrity/Operational">
    <Select Path="Microsoft-Windows-CodeIntegrity/Operational">
      *[System[Provider[@Name='Microsoft-Windows-CodeIntegrity']]]
      and
      *[EventData[Data[@Name='PolicyGUID']='{b6e0b4ef-9979-4124-80a1-5d5369cf8b85}']]
    </Select>
  </Query>
</QueryList>
"@

Get-WinEvent -FilterXml $filterXml
You can check the eventlog for event id: 3034. This event id means that the file under validation wouldn’t meet the requirements to pass the App Control policy if it was enforced. The file was allowed since the policy is in audit mode.
This is a good starting point for validating the impact of the Application Control for Business Policy in your environment. After you have successfully validate your rules and policy, you can enable the enforcement mode.