

Hello everyone. In my last blog post Mastering App Control for Business | Part 2: Policy Templates & Rule Options I wrote about the differences between the existing policy in Windows 11 and took explained the different rule options in a more technical way. I hope you have enjoyed the content so far.
In this post, I will describe something what a application tagging policy is, how you can use the tagging policy in combination with windows firewall rules and also talk a bit about the managed installer construct. In the future blog post I would share more about the implementation steps for Application Control for Business – the theory-heavy part is over. 😉
Previous Blog Posts:
- Mastering App Control for Business | Part 1: Introduction & Key Concept
- Mastering App Control for Business | Part 2: Policy Templates & Rule Options
Application ID Tagging Policy
As I already explained in my first blog post Mastering App Control for Business | Part 1: Introduction & Key Concept Application ID Tagging Policies are unlike base or supplemental policies, Application ID Tagging Policies does not allow or block any application or binaries from execution. Instead, they tags applications or files based on predefined rules with custom tags. That is why application tagging policies can only be used with user mode policy rules. For Application ID Tags you can use any alphanumeric string, including symbols like :/,._
Application ID Tagging Policy features are only available on the following versions if Windows:
Client
- Windows 10 20H1 and newer
- Windows 11 and newer
Server
- Windows Server 2022 and newer
The following rule types are supported when creating Application ID Tagging Policies:
- Publisher rules – These rules are based on the signing certificate chain. You can also combine this with properties like the original filename and version for more precise control.
- Path rules – Here, rules are created based on the file path or a folder path. Wildcards are supported, which gives you some flexibility when defining paths.
- File attribute rules – These are fixed file properties such as the original filename, file description, product name, or internal name.
- Package app name rules – These rules are based on the package family name of an AppX or MSIX application.
- Hash rules – Use this type to match files using their PE Authenticode hash (a unique fingerprint of the file).
In the future blog post I will explain how to create the base, supplemental und tagging policies in a more detailed way. But If you want to play around with the creation of a Application ID Tagging Policy, you can start with the following PowerShell command to create a tagging policy for the Global Secure Access Client:
New-CIPolicy -Level Publisher -ScanPath "C:\Program Files\Global Secure Access Client" -AppIdTaggingPolicy -AppIdTaggingKey "MyCustomKey" -AppIdTaggingValue "MyGreatAppTagID"
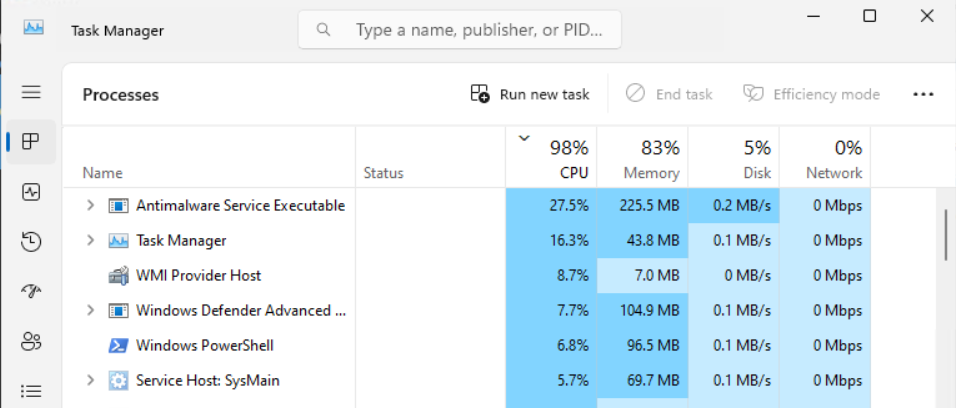
Note: The scanning process takes a while and might challenge your antivirus. 🙂
After finishing the scan (ScanPath “C:\Program Files\Global Secure Access Client”), the Application ID Tagging Policy XML file is created. It contains all identified publishers and add the AppIDTag Key and Value pair.
<?xml version="1.0" encoding="utf-8"?>
<SiPolicy xmlns="urn:schemas-microsoft-com:sipolicy" PolicyType="AppID Tagging Policy">
  <VersionEx>10.0.0.0</VersionEx>
  <PlatformID>{2E07F7E4-194C-4D20-B7C9-6F44A6C5A234}</PlatformID>
  <Rules>
    <Rule>
      <Option>Enabled:Unsigned System Integrity Policy</Option>
    </Rule>
  </Rules>
  <!--EKUS-->
  <EKUs />
  <!--File Rules-->
  <FileRules />
  <!--Signers-->
  <Signers>
    <Signer ID="ID_SIGNER_S_53" Name="Microsoft Code Signing PCA 2011">
      <CertRoot Type="TBS" Value="F6F717A43AD9ABDDC8CEFDDE1C505462535E7D1307E630F9544A2D14FE8BF26E" />
      <CertPublisher Value="Microsoft Corporation" />
    </Signer>
    <Signer ID="ID_SIGNER_S_54" Name="Microsoft Windows Third Party Component CA 2012">
      <CertRoot Type="TBS" Value="CEC1AFD0E310C55C1DCC601AB8E172917706AA32FB5EAF826813547FDF02DD46" />
      <CertPublisher Value="Microsoft Windows Hardware Compatibility Publisher" />
    </Signer>
  </Signers>
  <!--Driver Signing Scenarios-->
  <SigningScenarios>
    <SigningScenario Value="12" ID="ID_SIGNINGSCENARIO_WINDOWS" FriendlyName="Auto generated policy on 03-29-2025">
      <ProductSigners>
        <AllowedSigners>
          <AllowedSigner SignerId="ID_SIGNER_S_53" />
          <AllowedSigner SignerId="ID_SIGNER_S_54" />
        </AllowedSigners>
      </ProductSigners>
      <AppIDTags>
        <AppIDTag Key="MyCustomKey" Value="MyGreatAppIDTag" />
      </AppIDTags>
    </SigningScenario>
  </SigningScenarios>
  <UpdatePolicySigners />
  <PolicyTypeID>{A244370E-44C9-4C06-B551-F6016E563076}</PolicyTypeID>
</SiPolicy>
Windows Firewall and Application ID Tagging
Windows Firewall supports the use of Application Control for Business Application ID Tagging Policies. With this feature, you can scope your firewall rules to an application or a group of applications that have been defined in an base or supplemental policies. This opens up powerful new possibilities for securing your endpoints. Application Control for Business assigns a custom Application ID Tag to the process when a application is launched. The Windows Firewall can then use these tags to apply matching rules without a absolute file path or path variables in the rules.
For example: With this knowledge, you can tag Windows operating system components and corporate business applications using your Application Tagging Policy. Based on these tags, you can then create outbound firewall rules to allow internet access only for trusted, tagged apps and block all other internet traffic from your endpoints.
And of course, this works the other way around, too — you can also block specific tagged apps while allowing everything else.
Block outbound traffic by default – allow only traffic from tagged process
⚠️Act with caution and roll out the configuration to pilot systems first before deploying it broadly.
If you want to control the outbound traffic for all network profiles, this setting should be applied to the domain, private, and public profiles to ensure consistent behavior across all network profiles.
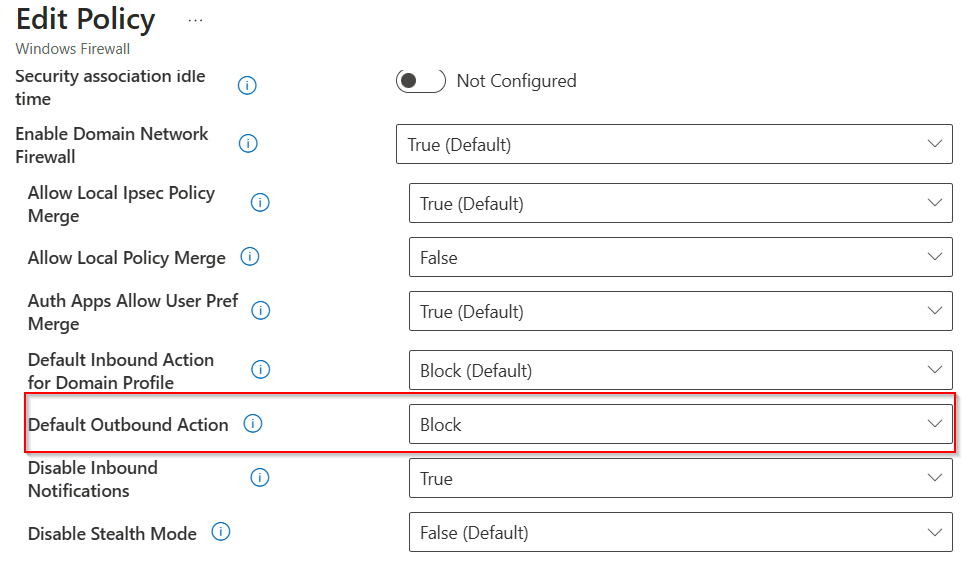
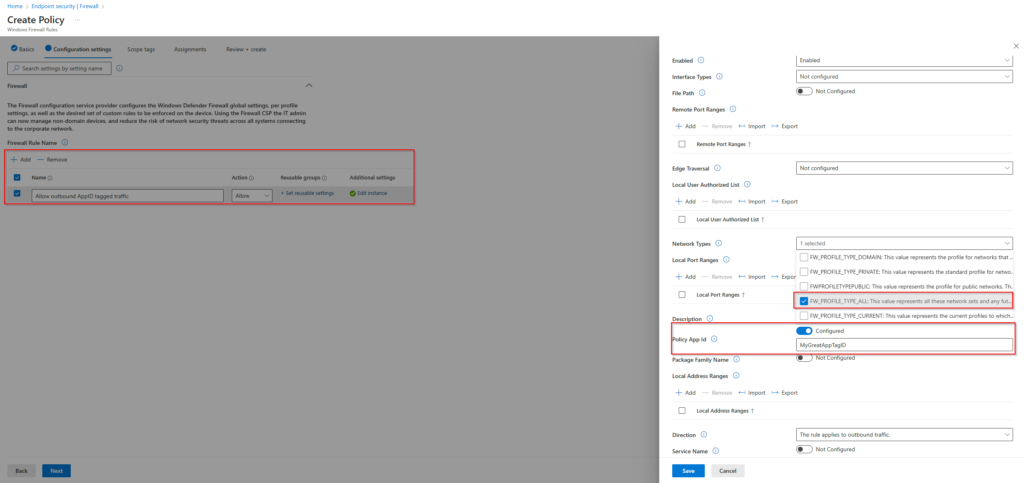
After the base configuration of the Windows Firewall is created, you must configure a Windows Firewall Rule Policy to control the outbound Traffic by an Application ID Tag.
Managed Installer
A Managed Installer is targeted by a policy similar to an Application Tagging Policy. App Control for Business includes a useful option called Managed Installer, which helps you balance security and manageability when enforcing your App Control policies.
This feature allows you to automatically allow / whitelist applications that were installed using Microsoft Intune Management Extension. At the time of writing this post, Microsoft Intune is the only Managed Installer that can be configured.
How does a Managed Installer work?
The Managed Installer feature uses a special rule set to define which binaries (installers) are considered trusted by your organization.
Here’s what happens under the hood:
- When a trusted installer setup binary is executed by Intune, Windows starts to track its process and all child processes.
- Any files that this process writes to disk are tagged as originating from the Managed Installer.
- If you’ve enabled the setting
Enabled:Managed Installer(rule option: 13) in your App Control policy, these tagged files are automatically allowed to run. You can read all about policy options in my second blog post about Mastering App Control for Business | Part 2: Policy Templates & Rule Options
Security Considerations
While convenient, the Managed Installer feature is heuristic-based — meaning it works by monitoring behavior during the setup, which was execute by Intune, not by explicit allow or deny rules. Because of this, you should apply it carefully, especially in high security environments.
Here a a few thinks to think about:
- Best suited for environments where users do not have admin rights and all or the most applications are deployed by Intune.
- If an attacker gained admin privileges, they could exploit the Microsoft Intune Management Extension process and bypass your policy.
- If an installer automatically launches an application right after installation, any files created during that first launch might also be trusted.
- To avoid this, make sure your deployment method does not auto execute the application after install.
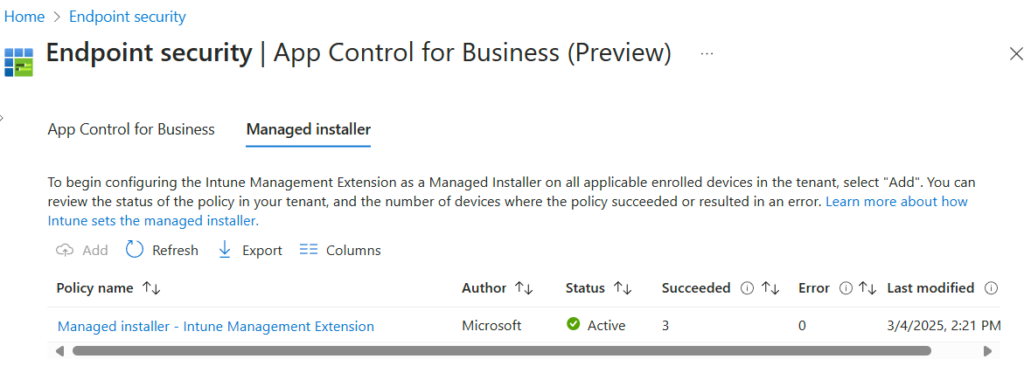
How to enable Managed Installer?
You can enable Intune as an managed Installer in the endpoint manager portal.
- intune.microsoft.com
- Endpoint security -> App Control for Business (preview)
- Managed installer tab and click on Add for adding Intune as managed Installaer